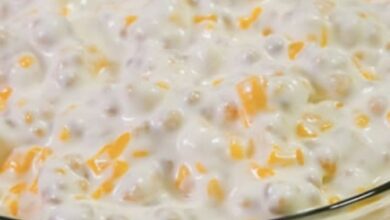
Not Yo’ Mama’s Banana Pudding
Not Yo’ Mama’s Banana Pudding takes the classic dessert to a whole new level with its creamy and indulgent layers. This delicious treat will have you coming back for seconds and thirds. In this article, we’ll guide you through creating the ultimate Not Yo’ Mama’s Banana Pudding that will have everyone asking for the recipe.
ADVERTISEMENT
Not Yo’ Mama’s Banana Pudding Recipe
Indulge in the decadent layers of Not Yo’ Mama’s Banana Pudding that will leave you craving for more. Let’s dive into the recipe!
ADVERTISEMENT
Ingredients
Below is a comprehensive table featuring all the ingredients you’ll need to make this delightful Not Yo’ Mama’s Banana Pudding:
ADVERTISEMENT
| Ingredients | Quantity |
|---|---|
| Vanilla Pudding Mix | 2 (3.4 oz) packages |
| Cold Milk | 4 cups |
| Sweetened Condensed Milk | 1 (14 oz) can |
| Whipped Cream | 1 (8 oz) container |
| Cream Cheese | 8 oz |
| Vanilla Extract | 1 teaspoon |
| Ripe Bananas | 5-6 medium-sized |
| Vanilla Wafers | 1 (12 oz) box |
Instructions
- In a large mixing bowl, combine the vanilla pudding mix and cold milk. Whisk until the mixture thickens and becomes smooth.
- In a separate bowl, beat the cream cheese until it’s soft and smooth. Add the sweetened condensed milk and continue beating until well combined.
- Fold the whipped cream into the cream cheese mixture until fully incorporated. The resulting mixture should be fluffy and light.
- Gently stir in the vanilla extract to enhance the flavor of the creamy mixture.
- Gradually add the prepared vanilla pudding to the cream cheese mixture, stirring gently until all the ingredients are well combined.
- Slice the ripe bananas into thin rounds.
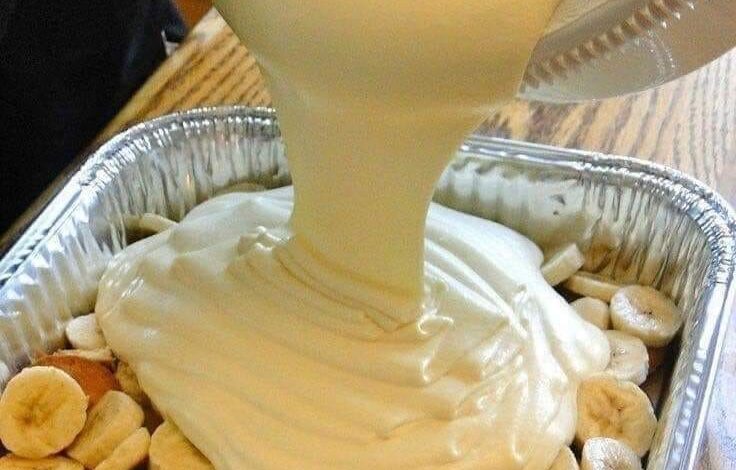
- In a trifle dish or a large glass bowl, start assembling the Not Yo’ Mama’s Banana Pudding. Begin with a layer of vanilla wafers at the bottom.
- Add a layer of sliced bananas on top of the wafers.
- Spoon a layer of the creamy pudding mixture over the bananas.
- Repeat the layers, starting with the wafers, then bananas, and ending with the creamy pudding mixture. Continue until you run out of ingredients, making sure the top layer is the creamy pudding.
- Crumble a few vanilla wafers over the top for added texture and decoration.
- Cover the bowl with plastic wrap and refrigerate for at least 4 hours or preferably overnight to allow the flavors to meld together.
Serve chilled and enjoy the luscious taste of Not Yo’ Mama’s Banana Pudding!
FAQ’s
- Can I use homemade whipped cream instead of store-bought? Yes, you can use homemade whipped cream for a fresher touch. Simply whip heavy cream with a little sugar until stiff peaks form.
- Can I use other types of cookies in the pudding? Absolutely! You can use shortbread cookies or graham crackers as a delicious alternative to vanilla wafers.
- Can I add some caramel sauce to the pudding? Of course! Drizzling some caramel sauce between the layers will add a delightful caramel flavor to the dessert.
- Can I make the pudding ahead of time? Yes, you can prepare the pudding and the creamy mixture ahead of time and assemble the dessert just before serving.
- Can I use frozen bananas for the pudding? Fresh ripe bananas are recommended for the best texture and flavor. Frozen bananas may alter the consistency of the dessert.
- Can I add other fruits to the pudding? While bananas are traditional in this recipe, you can experiment with adding other fruits like strawberries or peaches for a unique twist.
Not Yo’ Mama’s Banana Pudding is a crowd-pleasing dessert that will leave everyone raving about its incredible taste. The creamy layers, ripe bananas, and crunchy vanilla wafers create a delightful combination that is simply irresistible. So, treat yourself and your loved ones to this delectable dessert and enjoy every heavenly bite!